Installation
Categories:
Goal / when to use
Get Maxx Remote running so you can open the UI and create or load a project.
- Choose Desktop for commissioning laptops and day-to-day design work.
- Choose Docker for an always-on server that browsers can reach on the network.
Prerequisites
- Supported OS for Desktop, or a host that can run Docker
- Network access to your amplifiers (see Prerequisites)
- For automatic discovery (amplifiers and Dante TX sources): the host must receive the UDP broadcast / multicast traffic listed under Ports and discovery — on Docker that means host networking
Desktop application
- Download Maxx Remote from the Innosonix downloads page.
- Unpack or place the portable application where you want it — no installer is required.
- Start the application.
- On first launch, use Start a new project or import an existing project archive.
Expected result
The Maxx Remote window opens with the project splash / HOME UI. You can also reach the same UI in a browser at http://localhost:8000 while the Desktop app is running.
Server / Docker
Ports and discovery
Maxx Remote listens for more than the web UI. Automatic discovery uses UDP broadcast and multicast, which Docker’s default bridge network does not forward reliably when you only publish ports with -p.
| Traffic | Address / port | Purpose |
|---|---|---|
| TCP 8000 | host :8000 | Web UI and REST API |
| UDP 9453 | broadcast 255.255.255.255 | Innosonix amplifier discovery (INX / IDFM) |
| UDP 5353 | multicast 224.0.0.251 | mDNS — Dante device discovery (_netaudio-arc / _netaudio-cmc / _netaudio-dbc) |
| UDP 8702 | multicast 224.0.0.231 | Dante control-plane notifications (live TX updates) |
| UDP 8708 | multicast 224.0.0.233 | Dante heartbeats (device liveness) |
Maxx Remote also sends outbound unicast UDP to Dante devices (ARC channel queries, typically ports 4440 / 4444 / 4455, and CMC registration, typically 8800). Those are device-side ports — they are not something you “publish” on the container; the host firewall must allow the outbound path.
Publishing individual UDP ports with -p maps unicast traffic into the container. Discovery needs broadcast (amplifiers) and multicast with IGMP joins (Dante / mDNS). On a Docker bridge those packets usually never reach the process — so ADD FROM NETWORK and Dante TX discovery stay empty even if you map every port above.
Recommended: host network (discovery works)
Use host networking whenever you want automatic amplifier scan or Dante TX discovery:
docker run --detach --name maxx-remote --network host innosonix/maxx-remote:latest
Once the container is running, open:
http://<docker-host-ip>:8000
--network host is the approach used by Innosonix’s own deploy scripts. It is the simplest reliable way to put the process on the same L2 segment as amplifiers and Dante devices.
Alternative: published ports (UI only — no discovery)
If you only need the web UI and will add amplifiers by IP / hostname (and do not rely on Maxx Remote’s Dante discovery), bridge networking with a published HTTP port is fine:
docker run --detach \
  --name maxx-remote \
  -p 8000:8000 \
  innosonix/maxx-remote:latest
Compose equivalent:
services:
  maxx-remote:
    image: innosonix/maxx-remote:latest
    ports:
      - "8000:8000"
    # Discovery (INX + Dante) will not work reliably on the default bridge.
    # Prefer network_mode: host when you need ADD FROM NETWORK or Dante TX scan.
Do not expect a long -p 9453:9453/udp -p 5353:5353/udp … list to replace --network host for discovery. Map TCP 8000 for the UI; use host networking when discovery matters.
Persist project data (recommended)
If you start the container without a volume, the project lives only inside the container. Deleting or recreating the container deletes that data.
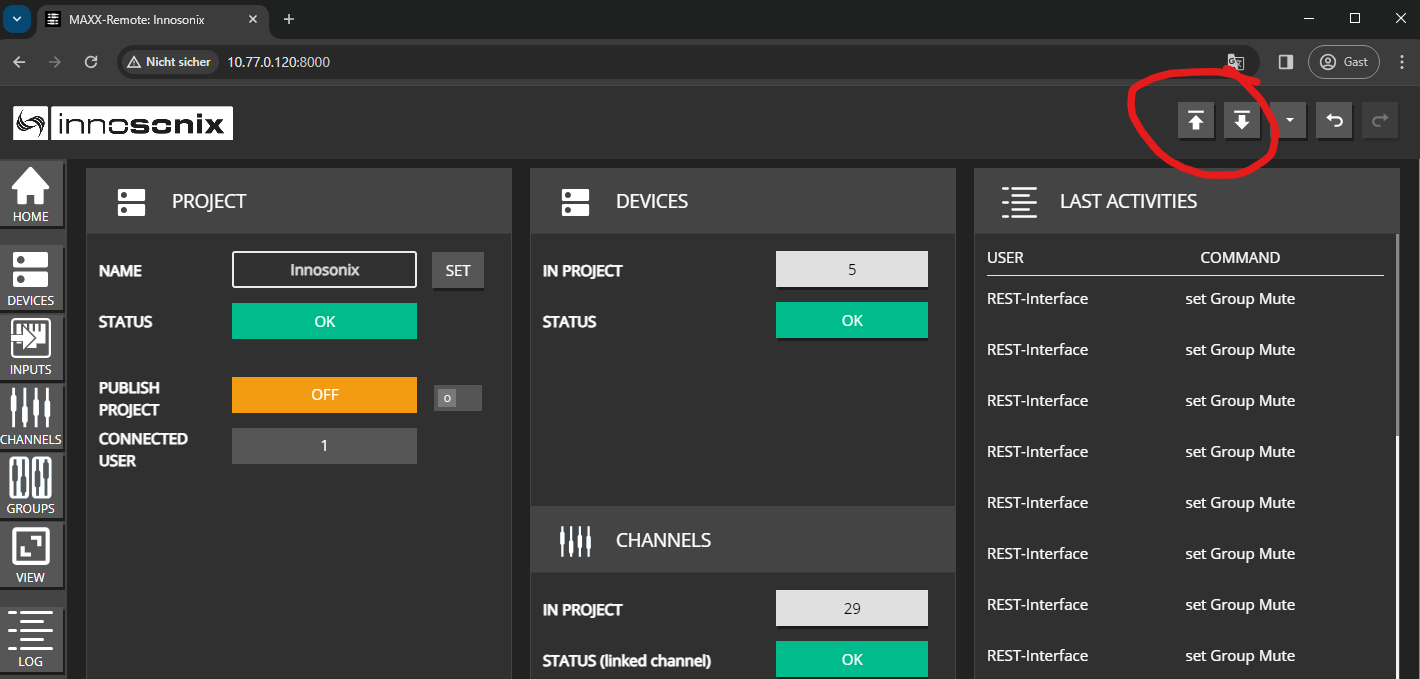
Option A — Export / import yourself
Use the UI Export / Import controls when you migrate to a new container.
Option B — Docker volume (preferred)
# create once
docker volume create maxx-remote-volume

docker run  --detach \
            --restart always \
            --name maxx-remote \
            --network host \
            --mount source=maxx-remote-volume,target=/root \
            innosonix/maxx-remote:latest
Expected result
Browsers on the network can open the Maxx Remote UI on port 8000, and projects survive container restarts when a volume is mounted. With --network host, ADD FROM NETWORK and Dante TX discovery can see devices on the same LAN segment.
Common mistakes
- Running Docker without
--network hostand wondering why ADD FROM NETWORK or Dante sources stay empty — discovery needs UDP broadcast 9453 plus Dante/mDNS multicast, not only published ports. - Assuming
-p 9453:9453/udp(or similar) is enough — bridge networking still breaks broadcast/multicast for discovery. - Recreating a container without a volume or export — project gone.
- Confusing port 8000 (UI / API) with discovery traffic (9453, 5353, 8702, 8708).