All function, the devices offers are available via the integrated REST-API.
The API is based on HTTP PUT / GET / OPTIONS / DELETE calls with JSON payload.
Every PUT / DELETE call has to be verified via a “Authentication Token” in the HTTP header.
The default token is: “f4005bf8507999192162d989d5a60823”
This documentation is more dedicated as general overview and description how to handle the API.
Each device includes the latest API-Documentation with all available calls.
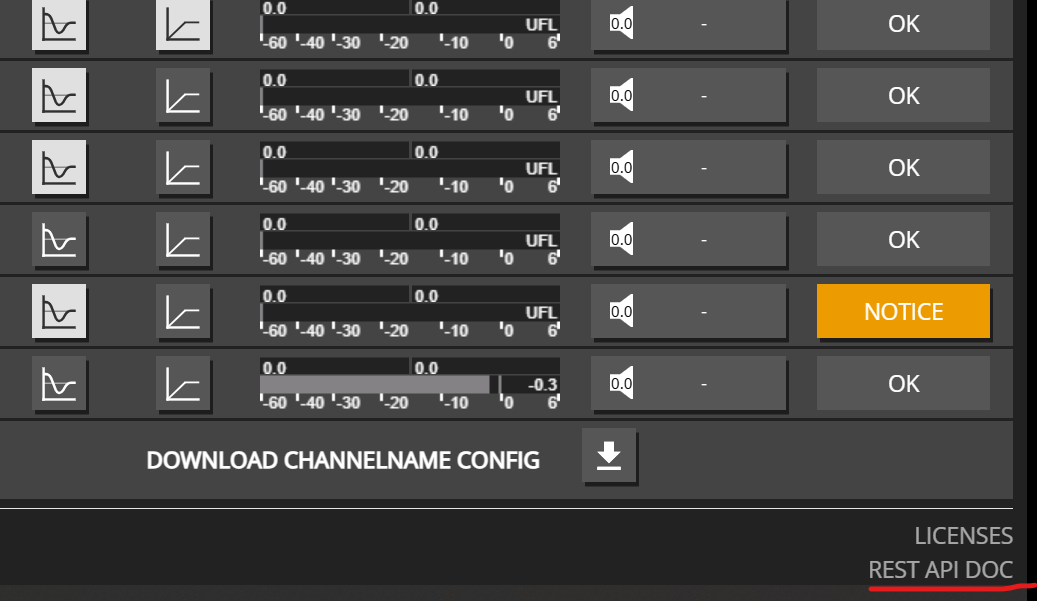
It can be found on the lower right corner of the OVERVIEW page:
Overall Structure
It’s an hierarchical REST API with partial resource updates, structured per channel and it’s corresponding resources like DSP / EQ / VOLUME / etc.
That means you can basically update the whole device with up to 32 channels, with a single HTTP PUT call like a HTTP PUT on http://{IP}/rest-api/settings with a json payload containing the requested structure.
settings/
channel/
1/
ampenable
dsp/
delay
eq
fir
mute
2/
ampenable
dsp/
delay
eq
fir
mute
etc…
device/
dante/
etc…
On the other hand, update single resources down in the tree is also possible, e.g. http://{IP}/rest-api/settings/channel/1/ampenable
1 - Channel Naming
Examples for getting and setting channel names
Channel Name Management
Channel names help you identify and organize your amplifier channels. Names can contain alphanumeric characters, spaces, and special characters.
Tip: Use descriptive channel names to make your system easier to manage, especially when integrating with home automation systems or control interfaces.
2 - Device Control
Examples for device-level controls (master mute, volume, startup settings)
Device-Level Controls
Device-level controls affect all channels globally. These are useful for master volume control, emergency mute, and startup behavior configuration.
Device Mute
The device mute acts as a master mute that affects all channels, regardless of individual channel mute settings.
Use Case: Enable startup mute to prevent audio from playing immediately after power restoration, giving you time to verify system status before audio begins.
Complete Device Control Example
Here’s an example that combines multiple device-level controls:
# Set device to start mutedcurl -X 'PUT' http://${IP}/rest-api/settings/device/dsp/startupmute \
-H 'Content-Type: application/json'\
-H 'token: f4005bf8507999192162d989d5a60823'\
-d '{"value": true}'# Set master volume to a safe levelcurl -X 'PUT' http://${IP}/rest-api/settings/device/dsp/volume \
-H 'Content-Type: application/json'\
-H 'token: f4005bf8507999192162d989d5a60823'\
-d '{"value": -10.0}'# Unmute device when readycurl -X 'PUT' http://${IP}/rest-api/settings/device/dsp/mute \
-H 'Content-Type: application/json'\
-H 'token: f4005bf8507999192162d989d5a60823'\
-d '{"value": false}'
3 - Device Information
Examples for retrieving device information
Getting Device Information
The device information endpoint provides details about your amplifier model, available channels, installed options, and hardware features.
Get Device Information
Retrieve all device information with a simple GET request:
model_name: The amplifier model (e.g., MA32D, MA32LP, MA24D2)
channel: Number of available channels (16-32)
options: Array of installed options:
IF1, IF2, IF3: Interface options
D1, D2, D3: Dante options
M1: Additional options
psu_fan: Whether PSU fan is installed
housing_fan: Whether housing fan is installed
This information is useful for:
Verifying device capabilities before making API calls
Determining available channel count
Checking installed hardware options
Building device-specific automation logic
4 - EQ Enable Control
Examples for enabling and disabling channel equalizers
DSP EQ Enable / Disable
The EQ enable control allows you to turn the entire channel equalizer on or off. This is useful when you want to temporarily bypass all EQ processing for testing or when switching between different audio processing modes.
Enable EQ for Multiple Channels
Enable the equalizer for multiple channels in a single request:
Note: When EQ is disabled, all equalizer settings (filters, gains, etc.) are bypassed, but the settings themselves are preserved. Re-enabling EQ will restore the previous equalizer configuration.
5 - Mute Control
Examples for controlling channel and device mute states
Channel Mute Control
Mute control allows you to silence individual channels or the entire device.
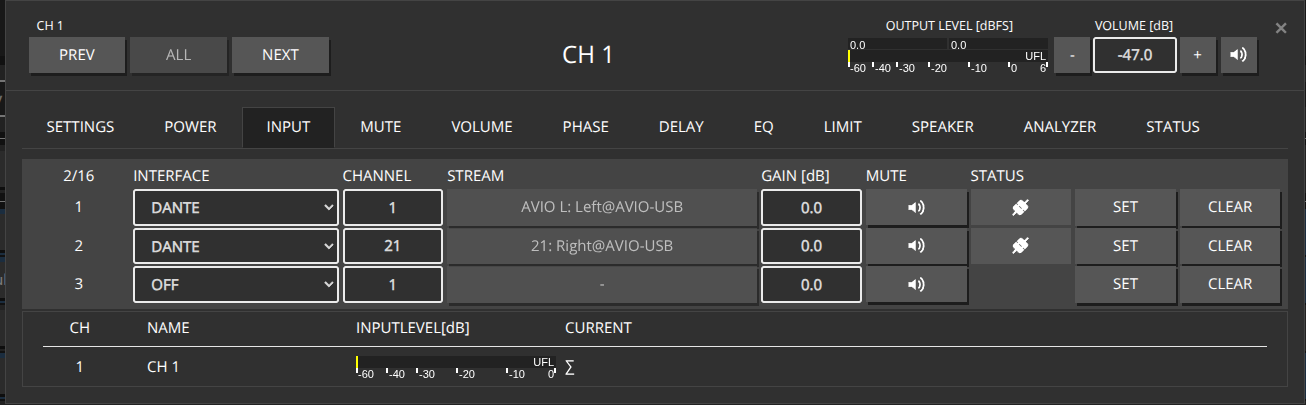
Example Configuration for CH1, CH2, CH4, CH7, switch between Dante Input 1-4 and Dante Input 21-24
HTTP Put a full json object containing all affected Channels into the http://${IP}/rest-api/settings/channel/ path
Advantage: Using the bulk endpoint /settings/channel/ allows you to patch multiple channels in a single HTTP call, which is more efficient than making individual calls for each channel. This reduces network overhead and ensures all channels are updated atomically.
To determine the source_id of the desired Interfaces, perform an HTTP OPTION call to http://${IP}/rest-api/settings/channel/1/dsp/patch' to get a list of available interfaces.
Alternatively, you can patch each channel individually by making separate HTTP PUT calls to each channel’s endpoint: http://${IP}/rest-api/settings/channel/{channel_id}/
This approach allows you to update channels one at a time, which can be useful when you need to patch channels conditionally or handle errors per channel.
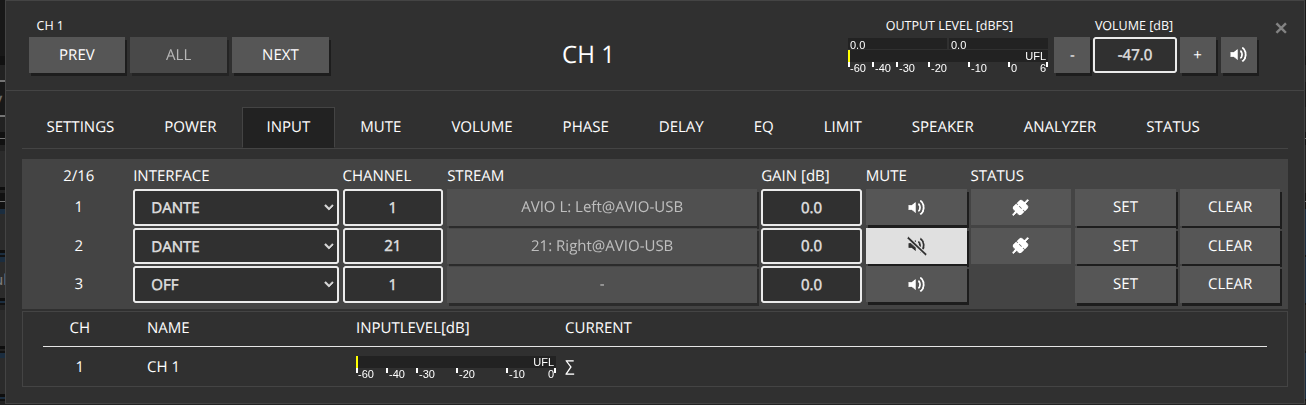
Assuming we’ve already patched our desired Inputs for each channel on Slot 1 and 2
When inputs are already patched, you can toggle the mute state between different patch slots (e.g., Slot 1 and Slot 2) by only updating the mute flag in the patch object. This is more efficient than repatching the entire input configuration.
HTTP Put a JSON object containing all affected Channels into the http://${IP}/rest-api/settings/channel/ path, specifying only the patch_id and mute flag for each patch slot.
You can also toggle mute on individual channels by making separate HTTP PUT calls to each channel’s endpoint: http://${IP}/rest-api/settings/channel/{channel_id}/